Support center for flex.bi version 4.0
Sales person target
- Gvido
- Inta (Deactivated)
- Laima (Deactivated)
We are going to create two kinds of reports:

Here are the live reports:
First, go ahead and follow the instructions on the Report definitions page to import the reports into your account's Invoice cube.
Some of your fields will be empty because we need to set our target data first.
Setting Target data
There are 2 ways how to set target data for salespeople:
- by editing a calculated member - use this method if you don't have a lot of data and you don't want to update your data too often
- by using external file import with the necessary data - use this method if you have data amount that will take too much time to copy by every field every time you want to change them
Editing calculated member
Creating sales person target
When you create a new cubes from HansaWorld application there are some calculated members that are created automatically. The one that we will take a look at will be "GP Target". That's also going to be how we are going to name our calculated member for sales person target.
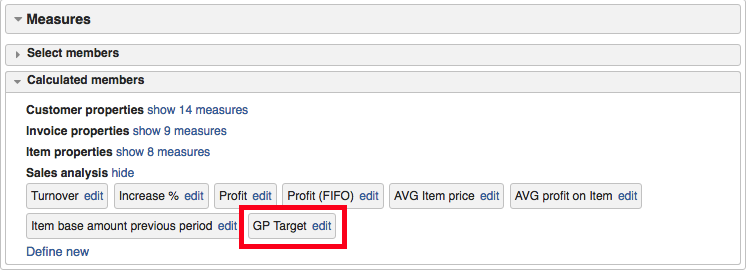
This calculated member is where a default GP target for salespeople is defined. If you click on "Edit" it should contain text similar to:
CASE
  WHEN
    [Person].CurrentMember.Name matches 'AM - Audrey McDonnall' THEN
    2000
  WHEN
    [Person].CurrentMember.Name matches 'APPLE - Apple Test User' THEN
    2000
...
...
...
  WHEN
    [Person].CurrentMember.Name matches 'NM - Nick Munchkin' THEN
    2500
  END
By editing some fields you can easily create your own targets. You just have to replace names and values. Names are put between apostrophes and values are just the numbers. In this example names and the values accordingly are:
Name | Value |
|---|---|
AM - Audrey McDonnall Value | 2000 |
APPLE - Apple Test User Value | 2000 |
NM - Nick Munchkin | 2500 |
In this example these are the sales targets for every person. If you strictly follow the syntax then you can just edit these fields and create your own sales person targets. You can just copy or remove fields that repeat to increase or decrease you sales person target count. For example, if you want to add a new person "KS - Keith Stevens" and have his sales target be 3000 you should add the following MDX query the the existing one:
...
  WHEN
    [Person].CurrentMember.Name matches 'NM - Nick Munchkin' THEN
    2500
  WHEN
    [Person].CurrentMember.Name matches 'KS - Keith Stevens' THEN
    3000
END
Advanced users also can use regular expressions. For example, instead of writing the full names you could use 'APPLE.*', 'AM.*' and 'NM.*' names and they would work the same as the full names. The combination of .* symbols just means that the word sequence can be followed by any symbol any number of times.
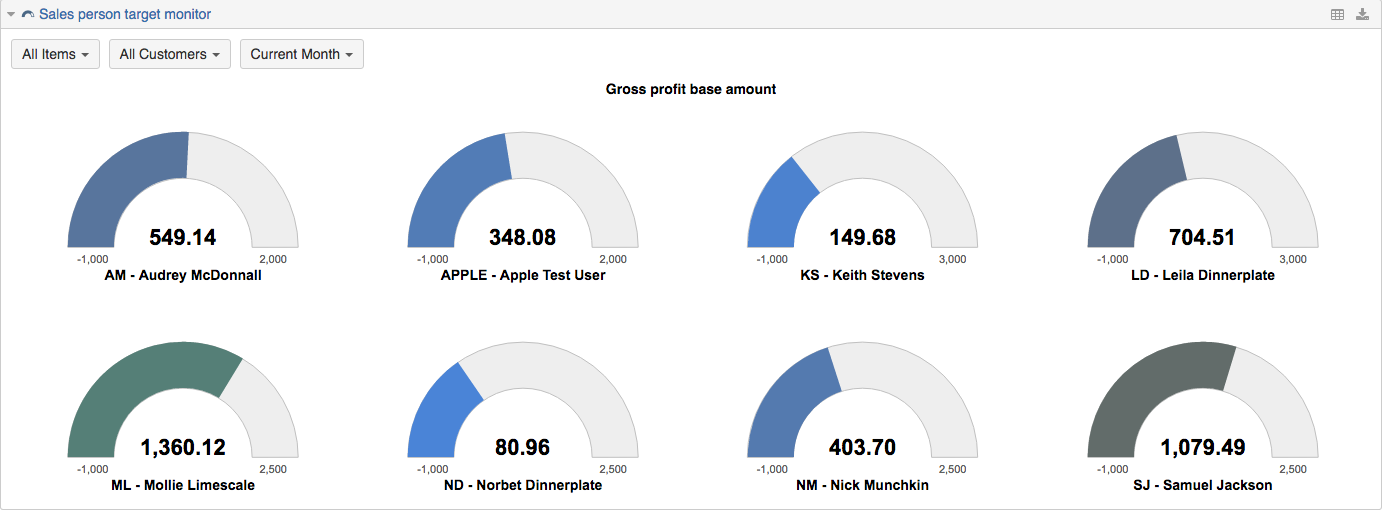
After you have set your sales person targets go back to the reports we imported at the very start and you should see the reports showing values for the "GP target" calculated member.
Customising calculated member
Like we just added our own fields to Flex.bi we can do it the same way with every dimension. For example, if you would like to add your own value fields to Customer dimension you would just have to change "[Person]" to "[Customer]" and add the appropriate names and values as we discussed before.
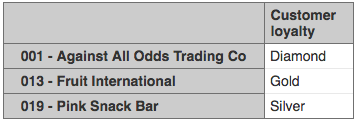
You can also copy and name them as you want. For example, if I would like to rate my customers I would create a new calculated member with a name " d add the appropriate names and" and add a similar MDX query as before:
CASE
  WHEN
    [Customer].CurrentMember.Name matches '019 - Pink Snack Bar' THEN
     'Silver'
  WHEN
    [Customer].CurrentMember.Name matches '013 - Fruit International' THEN
    'Gold'
  WHEN
    [Customer].CurrentMember.Name matches '001 - Against All Odds Trading Co' THEN
    'Diamond'
END
Here's a small report that shows how this calculated member works:
If you created your own calculated member with a different name, in order for the report to work you should you will also have to update "Sales person target monitor" report and update "Sales person target monitor overview" report.
Using external file import
Importing the target data
You can also import data into your account using Excel and CSV files.
First let's create an simple excel file with the following data:
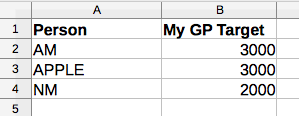
The keys for every person in Person column you can get by going to your Flex.bi account and selecting "Person" dimension. The first initials of the person field names will be the identifier for each person. You can see an example for the fields keys in the table above. "AM - Audrey McDonnall" key is "AM" and so on.
"My GP Target" will be data of your choice. It's going to be the sales target for the every person field.
Next, you just save the file and upload it to your flex.bi account, find the uploaded file under the "Source data" → "Source files" section and click on "Preview". Then just follow the instructions on the page how to import Excel and CSV files and you should get a setting similar to this:
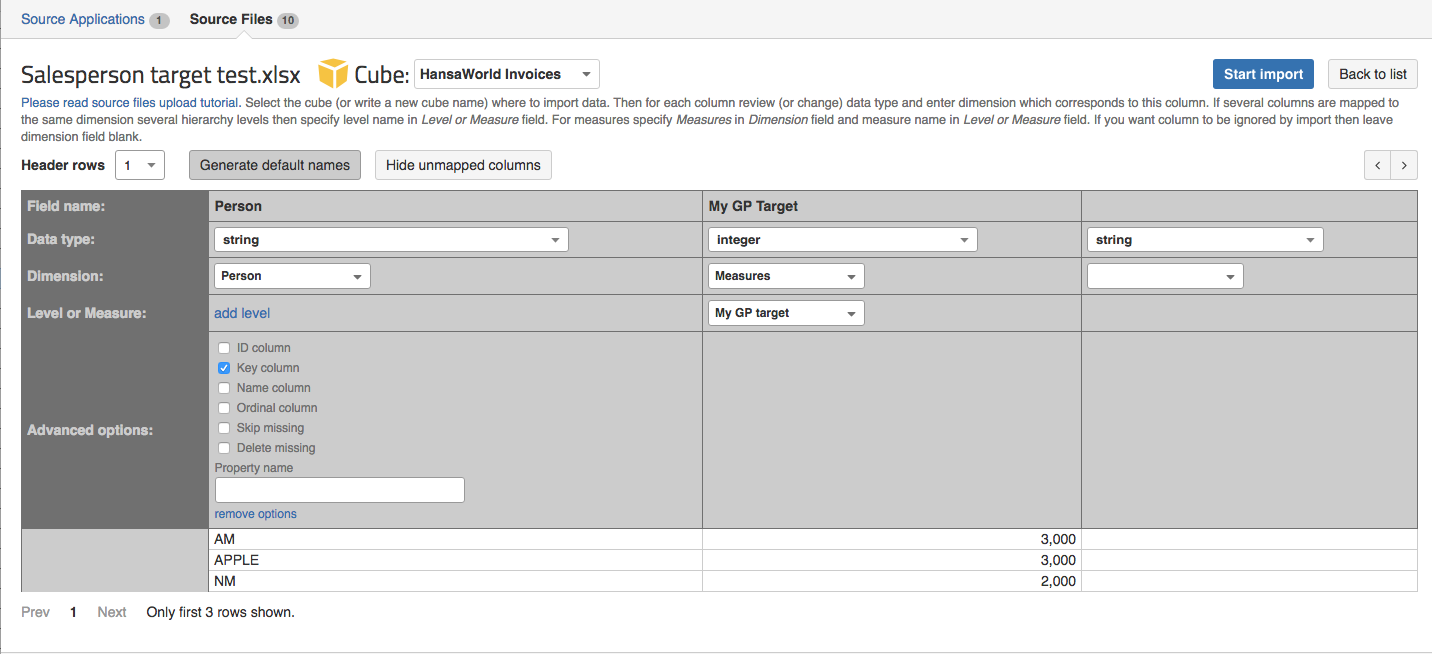
Then just click on "Start import" and Flex.bi will map the data for you. After the import is finished in your Invoices cube you should see a new User defined calculated member. It will match the name that you have specified earlier as the column name for the target GP values. Now when you select it you will see that the data that you have imported:
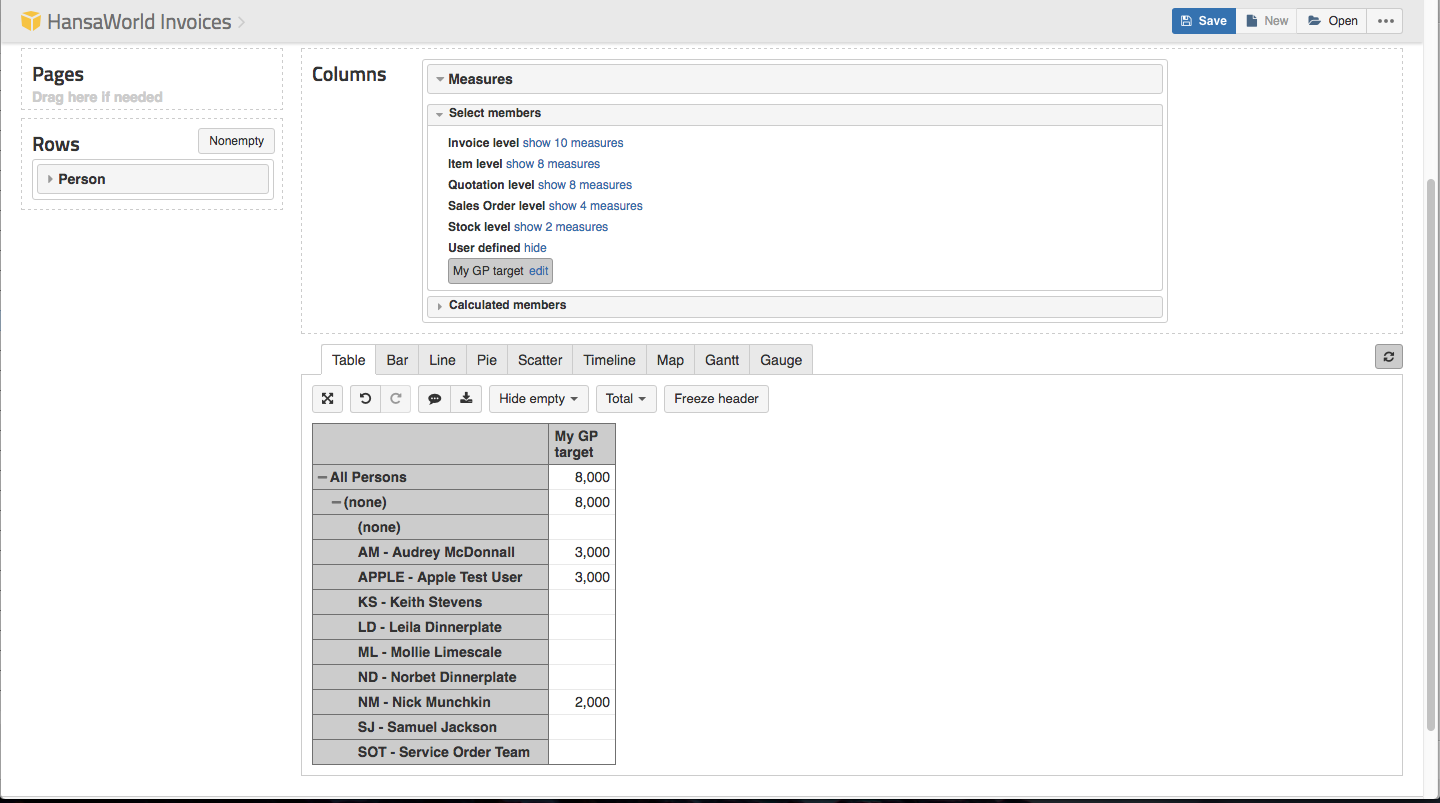
Every time you need to update your data you can now just edit your Excel file, upload it with the same name and the data will be mapped automatically with the previous setting. This way updating the data in future will be fast and simple.
You can read more about the method in our documentation page here.
Updating "Sales person target monitor" report with the new data
In the report "Sales person target monitor" that we imported calculated member "GP Target" is used. When importing the GP target data we named the calculated member differently so we have to change it in the report as well. In this example we will have to replace the calculated member "GP Target" with "My GP target".
Go ahead and disable the "GP Target" calculated member and enable "My GP target".
To finish up the report go back to "Gauge" tab click on a measure's name that is not your target and select "Gauge limits":
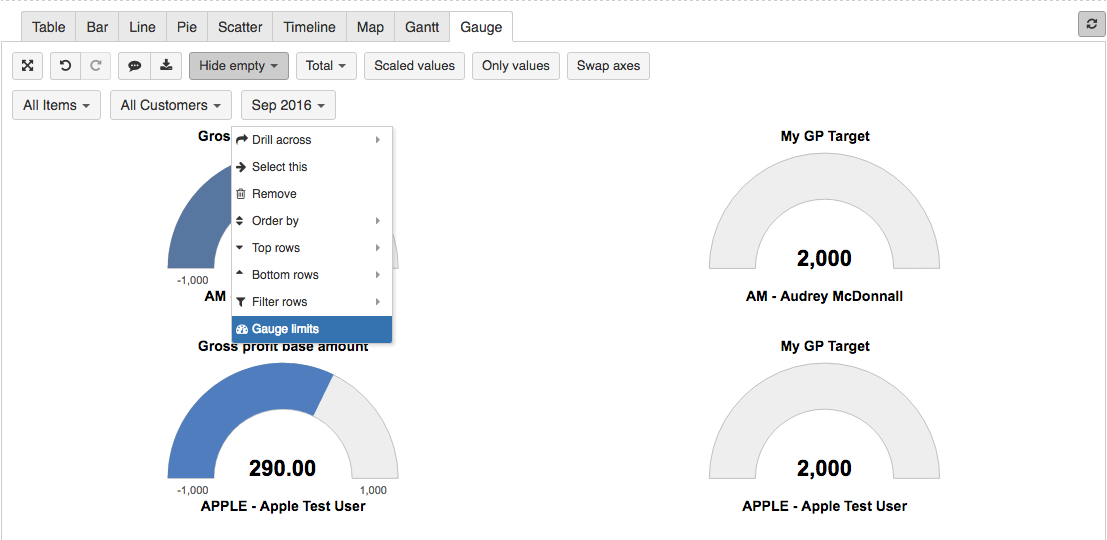
Here you have to set your target as measure. In this case it would be "My GP target".
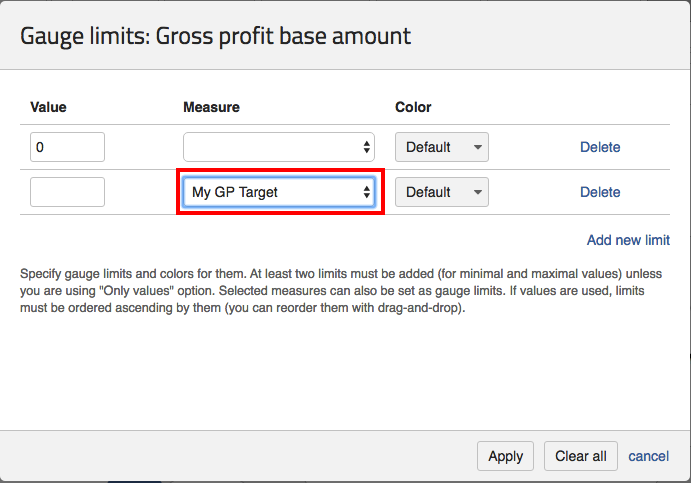
Just apply the changes and you will have your own gauge limit report ready.
If you wish you can further customise the gauges by changing colours and adding more values if you would like.
Updating "Sales person target monitor overview" with the new data
For Sales person target monitor overview report we will have to change MDX queries for these calculated members:
- GP Target %
- Still to go
All you have to do is to click on "Edit" on the calculated member and change the "[Measures].[GP Target]" to "[Measures].[My GP target]".
For example, for "Still to go" calculated member you would have to change the MDX query from
[Measures].[GP Target] - [Measures].[Gross profit base amount]
to
[Measures].[My GP target] - [Measures].[Gross profit base amount]
Now do the same for the "GP Target %" calculated member and you the calculated members showing correct values.
All that is left is to enable the "My GP target" calculated member and drag and drop the column to the appropriate place.