Support center for flex.bi version 4.0
Competition algorithm
- Gvido
- Miks Valers
By following the instruction in this solution page you will be able to create a competition algorithm:
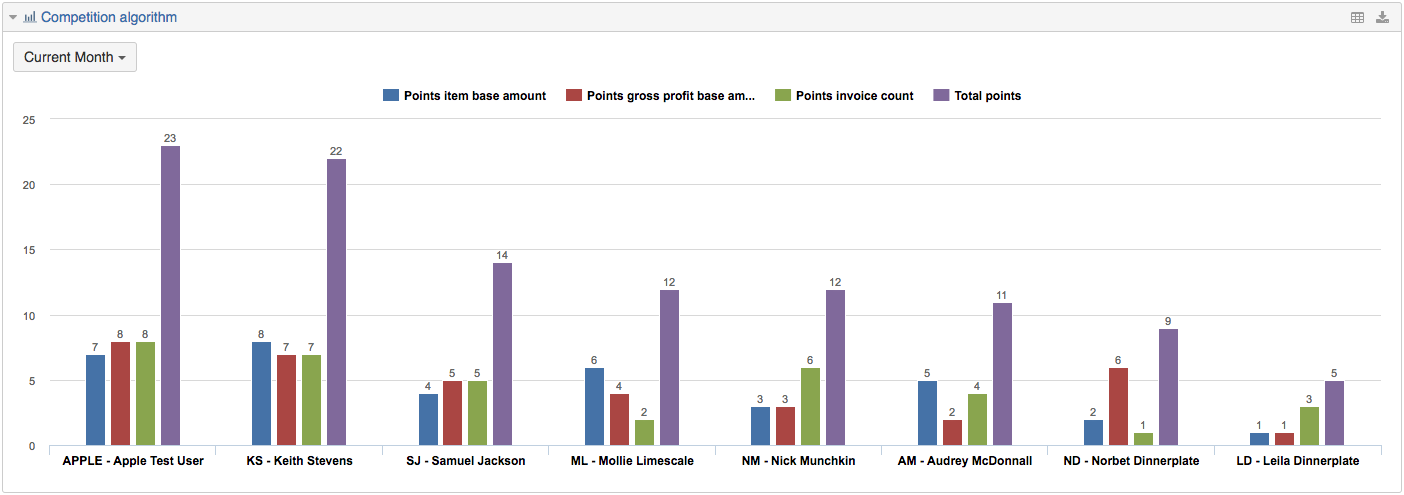
The report live: https://flex.bi/bi/accounts/47/cubes/HansaWorld%20Invoices/reports/1944-individual-results
When you have set up the competition algorithm you can also organise the people in team to create a "team competition algorithm".
PICTURE...
The report live: https://flex.bi/bi/accounts/47/cubes/HansaWorld%20Invoices/reports/1945-contest-result
Setting up "Competition algorithm" report
First, go ahead and follow the instructions on the Report templates library page to import the report's definition that is found here: https://flex.bi/bi/accounts/47/cubes/HansaWorld%20Invoices/reports/1944-individual-results
Adjusting points
When you import the report you need to adjust the points.
In order to do that you have to edit each of your "Points" calculated members. When you import the report you will have 3 of them:
- Points item base amount
- Points gross profit base amount
- Points invoice count
What you have to edit will be just the number at the start of the calculated member:
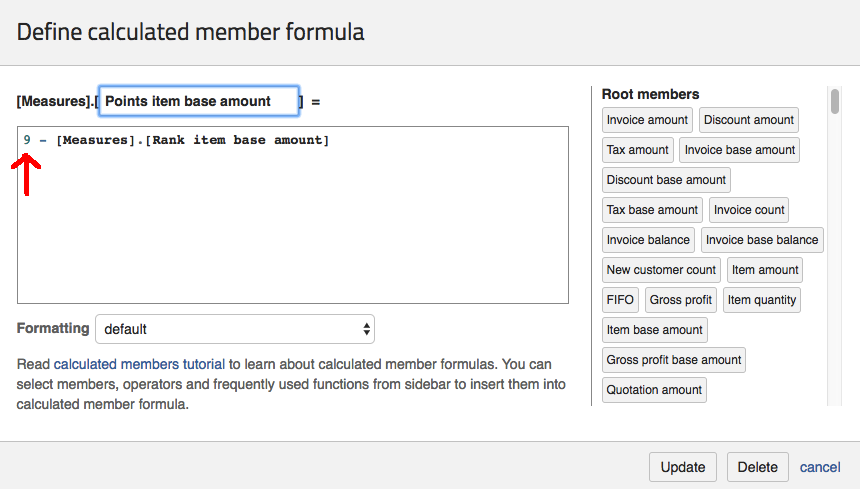
The number should be the members you have selected plus one (selected members +1).
For example, if you have selected your top 10 salespeople and you want to rank them then you should edit the value to be 11.
You can also freely edit the calculated member's name.
Customising measures
If you want to change a measure that the points are shown by you have to edit one of the 3 calculated members that are found in "Measures" dimension:
- Rank item base amount
- Rank gross profit base amount
- Rank invoice count
They work completely by the same principle but the only difference in the calculated members is the measure they use.
Each calculated member corresponds to one of the 3 points calculated members:
- Rank item base amount → Points item base amount
- Rank gross profit base amount → Points gross profit base amount
- Rank invoice count → Points invoice count
So, for example, if you want to change the "Points item base amount" measure then you will have to change the "Rank item base amount" and so on.
It should look like this:
All you have to do is change the [Measures].[Item base amount] measure that I have marked to one of the measures that are found in the calculated member list. You can insert the measure in the text field just by clicking on it. Find the member you want to use, click "update" and have the forecast will change to the measure you wanted.
For example, if you would like the trend to be about the "Invoice count" then you would have to replace [Measures].[Item base amount] with [Measures].[Invoice count].
You can also freely edit the calculated member's name.
Adding/removing calculated members from Total
In order to add/remove calculated members from "Total points" you have edit the sum list:
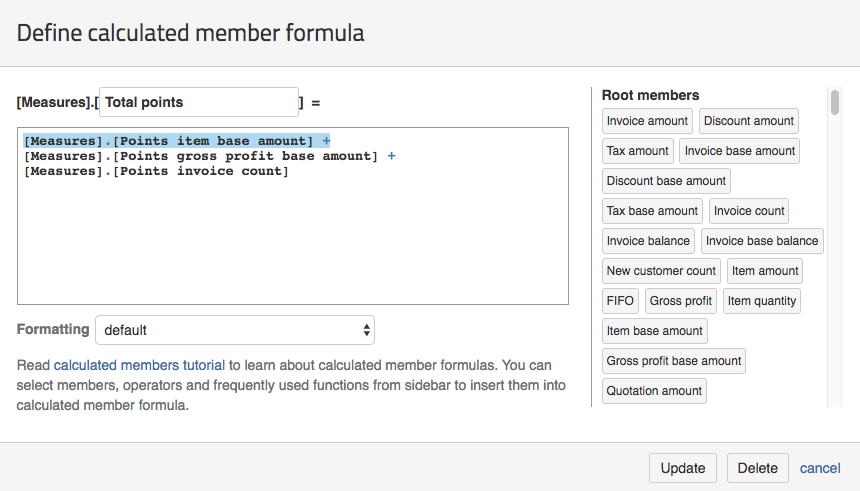
The formula for this calculated member is that it just sums all the points values. So in order to remove one you would have to remove it from the equation. It's like "CM1 + CM2 + CM3" where CM1 is [Measures].[Points item base amount], CM2 is [Measures].[Points gross profit base amount] and CM3 is [Measures].[Points invoice count].
So, for example, if you would like to remove [Measures].[Points item base amount] from the list you would need to delete it together with the "+" sign. That would make the equation "CM2 + CM3 = ?"
In order to add new calculated member you would just need to add a "+" sign and select the measure from the member list and make to formula "CM1 + CM2 + CM3 + CM4" where CM4 would be your measure.
Creating new calculated members for Total
Now if you would like to add more values to the "Total points" then you would need to:
- Copy the formula for calculated member "Rank item base amount"
- Create your own Rank calculated with the formula you copied and name it similarly as you want
- Change the measure
- Create a new calculated member with a formula similar to "Points item base amount". Just adjust the number and change the measure that is used to the one you just created.
- Add the newly created calculated member with Points to the "Total points" calculated member.
Changing rank dimension
In order to change the dimension that you want to your calculated members to use you have to edit all of your calculated members that show Rank.
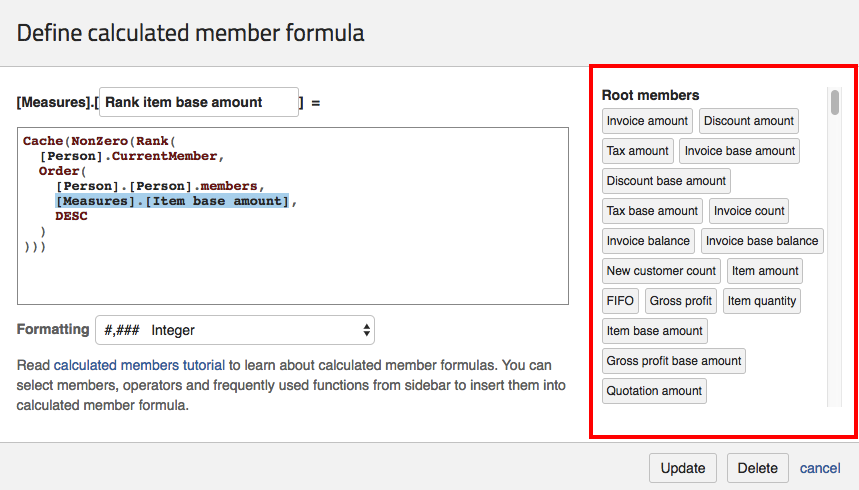
First, you have to change this calculated member's dimension that you are currently using for the rows:
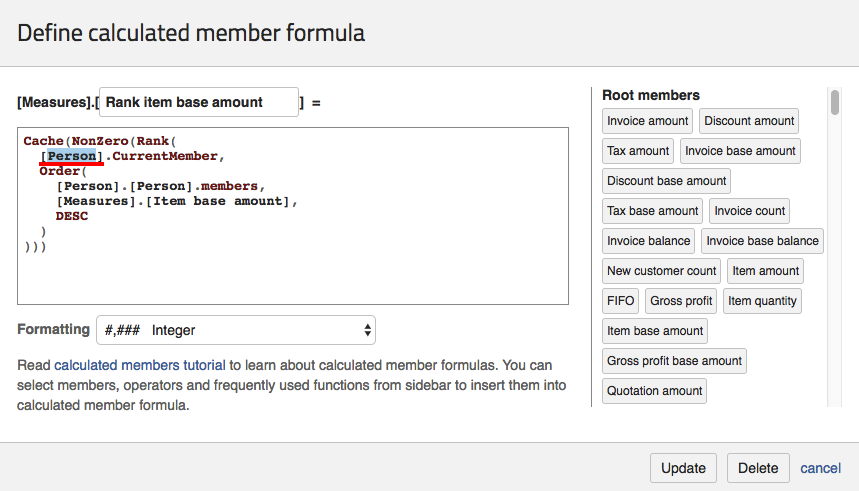
Replace the "Person" with the current dimensions name.
For example, if you would like to use Project (Job) dimension you would have to replace the line "[Person].CurrentMember," with "[Project (Job)].CurrentMember,".
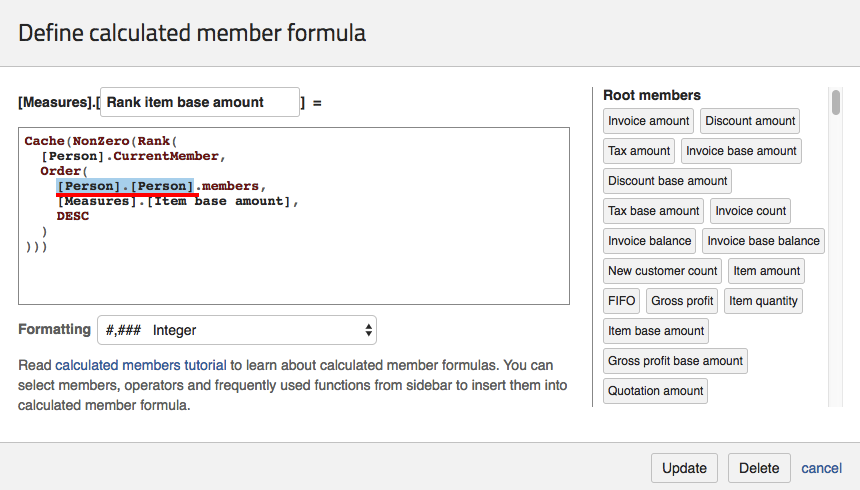
Next, you will have to provide the hierarchy level you want Flex.bi to rank:
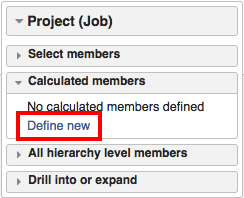
To find the correct dimension go to your dimension you want to use → Calculated members → Define new.
Here you will use "Hierarchy levels" section to get the correct the hierarchy level name:
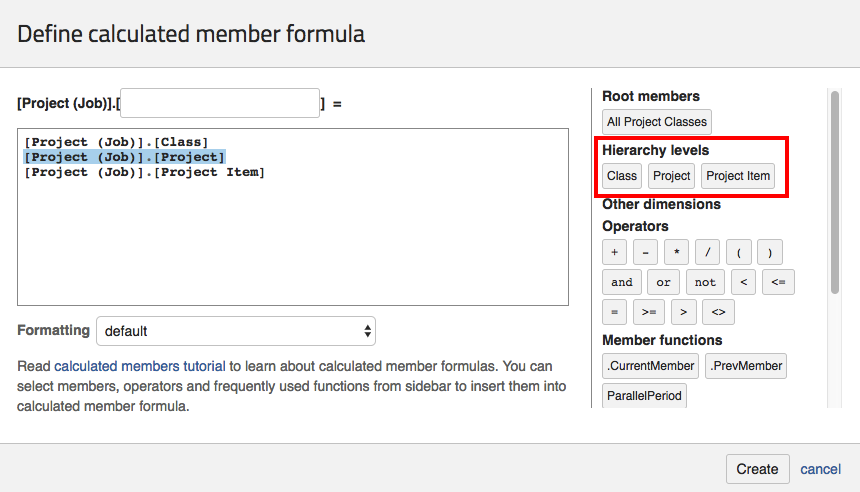
Click on the level you would like to be ranked and it will paste the correct name into the text field. Copy this text and paste it in "Rank item base amount" calculated member's place I pointed out before.
For example, you you would like to use Project (Job) dimension's Project hierarchy's level instead of Person the line replacement would look like this: "[Person].[Person].members, " → "[Project (Job)].[Project].members, ".
The last step is to remember to drag and drop the corresponding dimension (in this case Project (Job) dimension) in as "Rows" and that's it. Now you will be able to see the rank about Projects instead of Persons.
Just remember that the commas at the and of the lines are also important.
Setting up "Team competition algorithm" report
Here's a report you can import as an example: https://flex.bi/bi/accounts/47/cubes/HansaWorld%20Invoices/reports/1945-contest-result
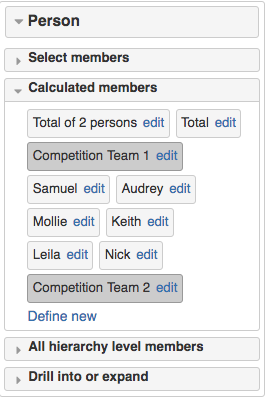
After you have set up "Competition algorithm" you can organise the report persons in teams. It can be done in three steps:
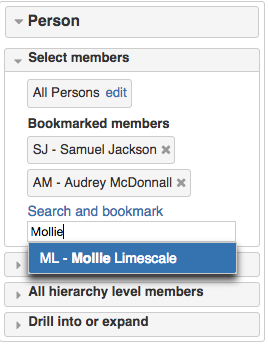
- "Search and bookmark" the persons you want to have in teams like shown in picture.
- Aggregate them in a new calculated member by selecting members from "Bookmarked members" list. Remember to put commas after each member (except the last one).
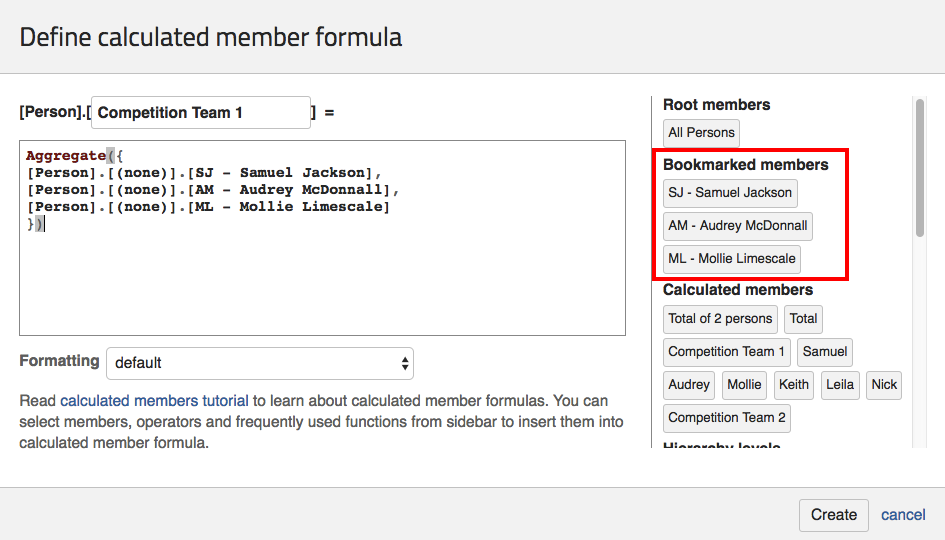
- Select the newly created members from the dimension you created them in.