Support center for flex.bi version 4.0
Budget import from MS Excel & Google Sheets
Budget entering templates: | |
|---|---|
| MS Excel templates: | Google Sheets templates: |
1 year budget for few objects & few accounts (blank): 1 year budget for few objects & few accounts (with sample data): | 1 year budget for few objects & few accounts (blank): 1 year budget for few objects & few accounts (with sample data): 1 year budget for many objects & accounts (blank): 1 year budget with confirmation option & email notifications (blank): |
Preparing a file for import
A correct file requires you to:
- Create a header for your file, that lists all the column names
- Add data for those columns and make sure that all data has the same format.
Cell formatting
When creating a .csv / .xls file in a spreadsheet program make sure to set all the column data types to plain text, because some programs like to convert the formats for dates and add commas and other separators for formatting, these changes can alter the way flex.bi will interpret the data.
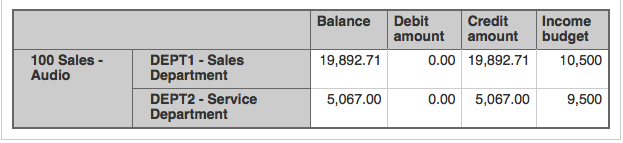
An example file is displayed below:
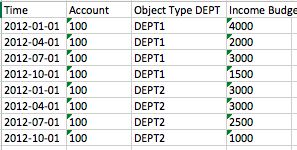
This file contains 4 columns:
- Time – connected to the Time dimension by the date specified.
- Account – the account number to which the data will be connected.
- Object Type DEPT – the lower level members of the Object Type DEPT that the data will be connected to.
- Income Budged – the Measure that will be added to flex.bi & with which you can do further calculations.
Importing the file / Google Sheet document into flex.bi
Importing .xls or .csv file
To import .xls or .csv file, all you have to do is to upload it to flex.bi like you would any other file by uploading it through the Source Data tab Source Files section in flex.bi, choosing file from your computer & pressing button 'Upload'.
Then press on the Preview (button) next to your uploaded file.

A new page will appear:
Importing Google Sheet document
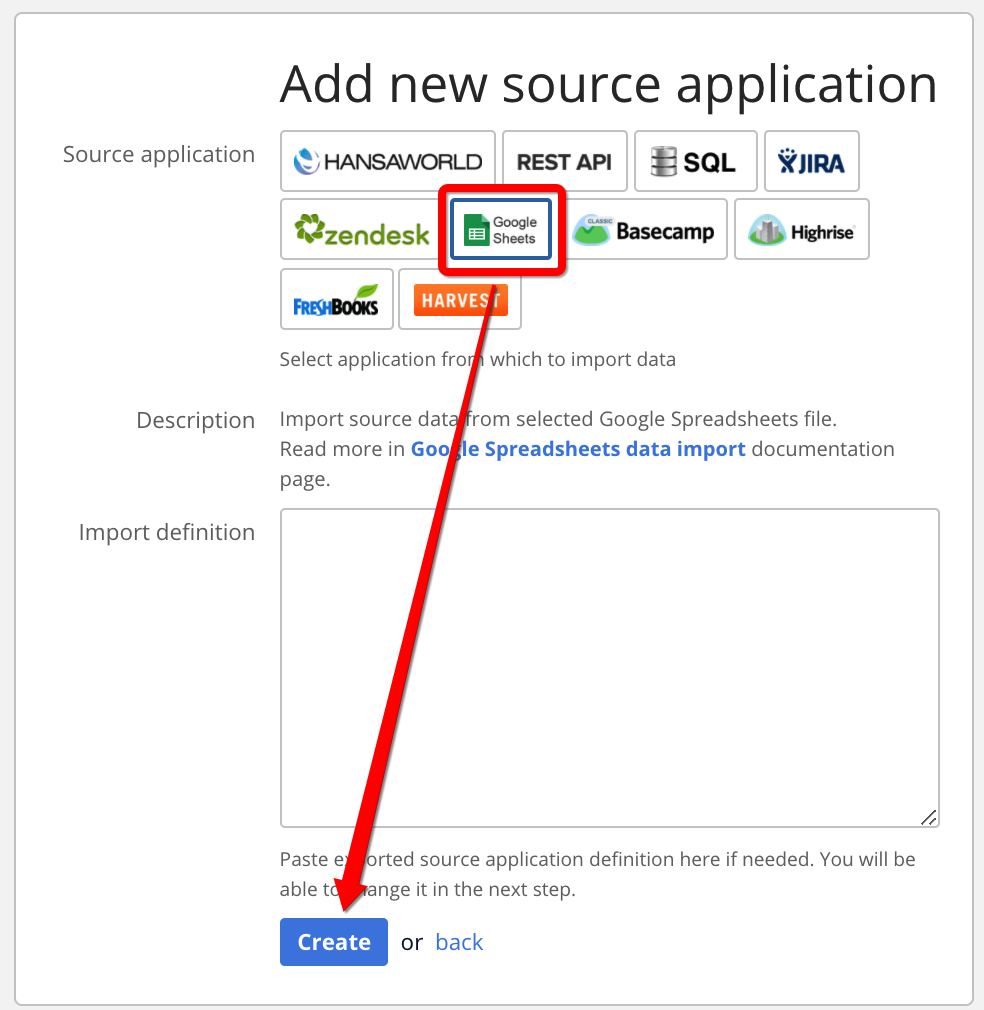
To upload Google Sheet document, you have to go to Source Data tab Source Applications section, press button 'Add new source application', choosing Google Sheets button & pressing button 'Create'.
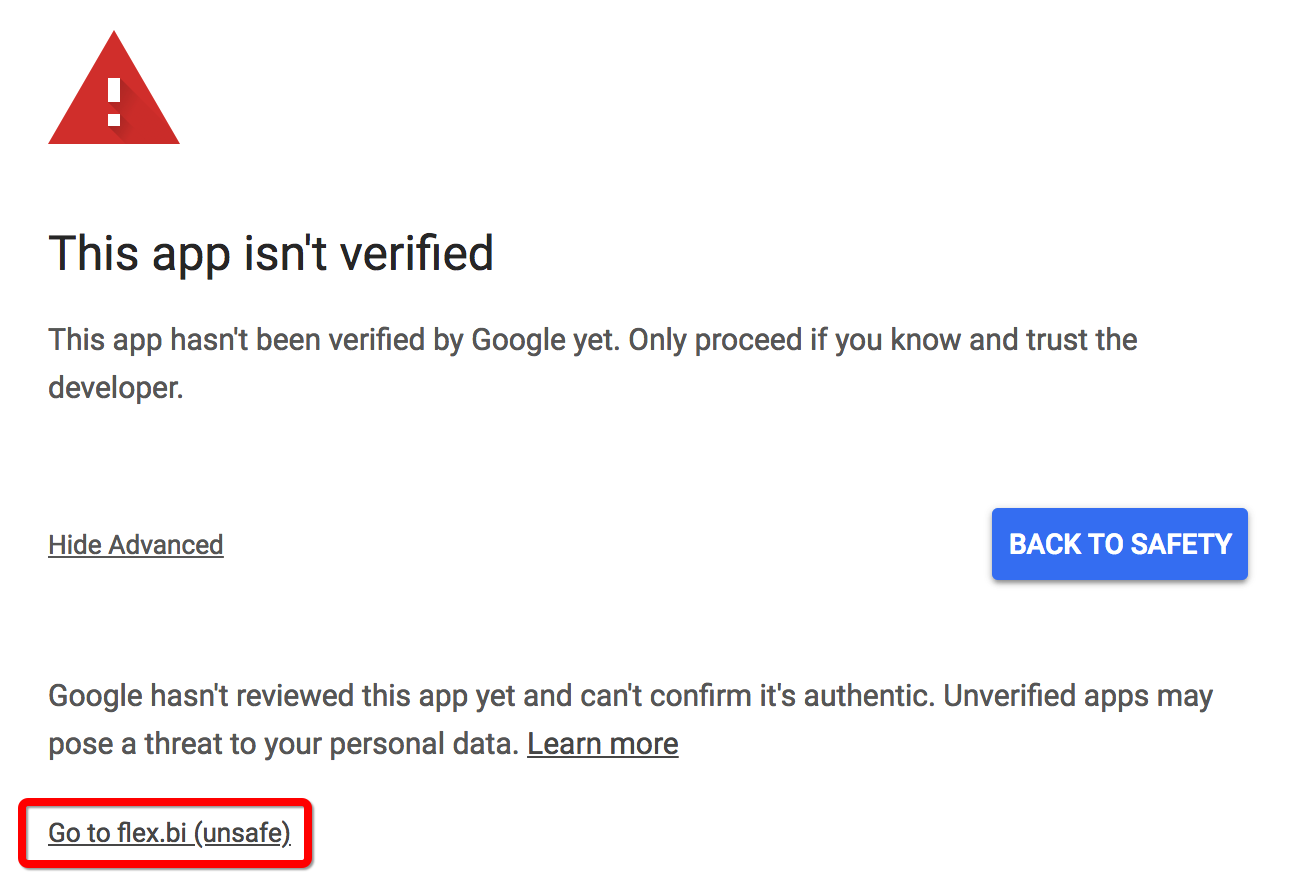
You will have to choose your Google account to connect it to flex.bi & enter your log-in credentials. A new window will show up with warning that flex.bi application will be accessing the specified documents in your Google Drive account – to ensure the access, you need to press on link 'Advanced',
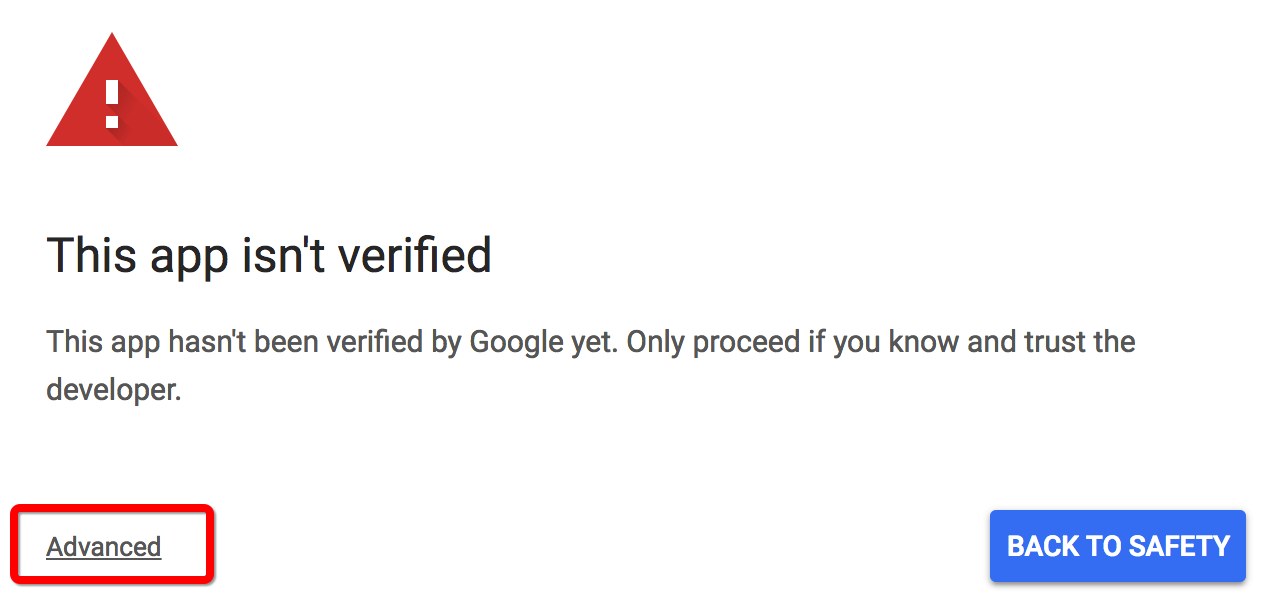
click on 'Go to flex.bi (unsafe)'
and press button 'Allow'.
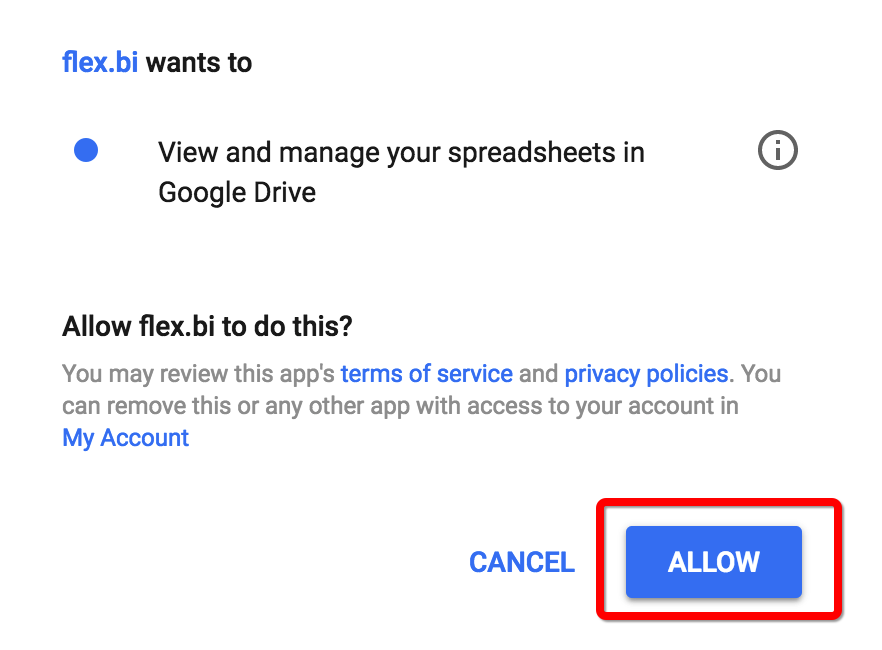
After granting access, you will see a new window where you should specify which document flex.bi will have access to by choosing File from the drop-down, choosing sheet in the file. You can also choose regular import frequency here (if necessary) & press button 'Continue'.
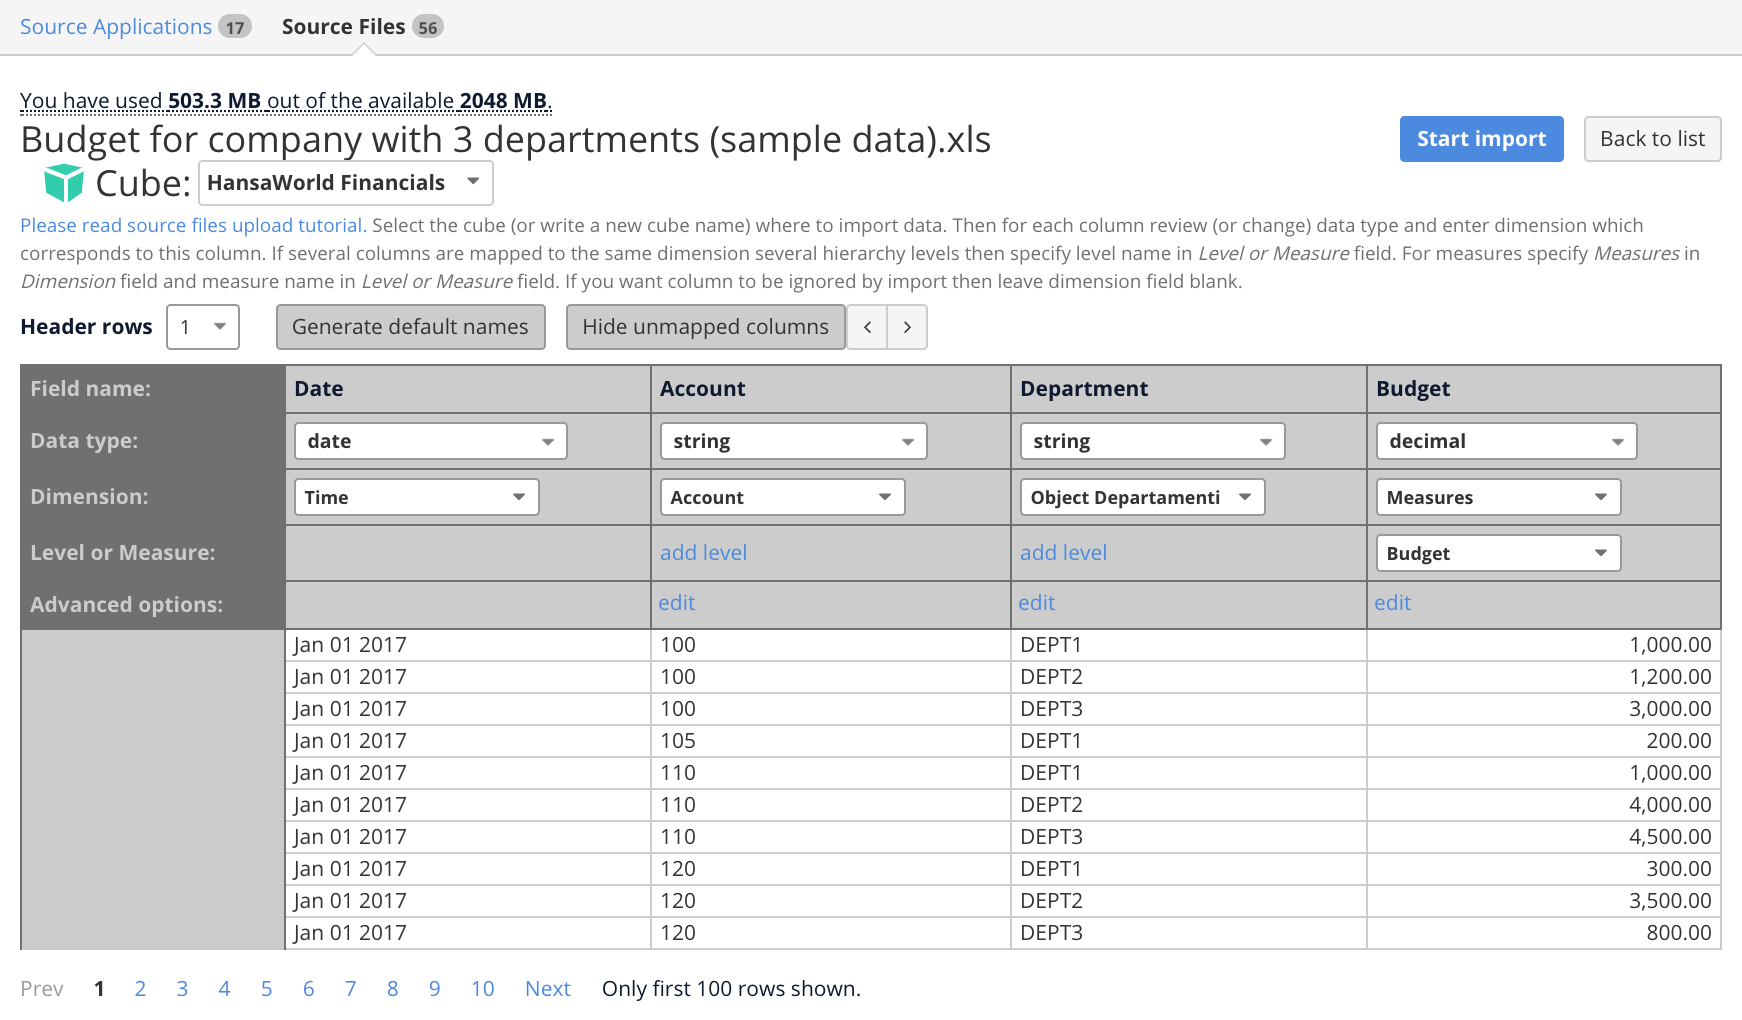
Mapping of the data (same for .xls, .csv & Google Sheets)
In this page you have to:
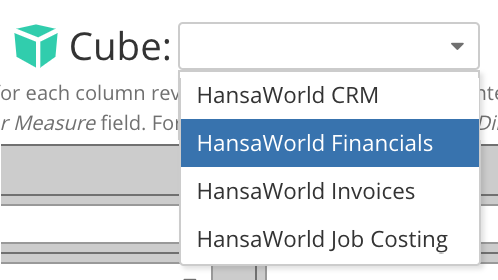
- Select the cube you wish to import the data into by selecting the cube name from the "Cube" drop-down list
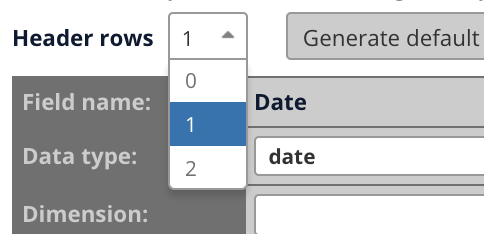
- Selecting the amount of header rows you have in your file by selecting the amount from the "Header rows" drop-down list (for the example file the amount should be set to 1 header row). Once you change the amount you will be prompted to reload the page.
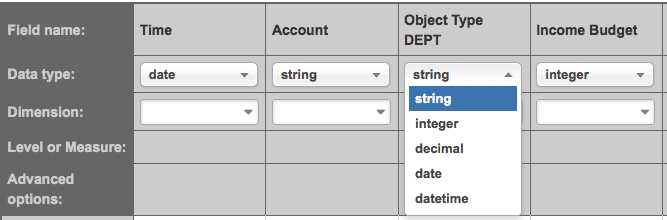
You have to select the data types for each of the columns being mapped. Each data type is used for the following data:
String – used for fields that need to be interpreted as text, that is, you won't be doing any mathematical calculations with them.
Integer - used for fields that need to be interpreted as whole numbers (1 or 2, or 3, or 20000), you plan to do mathematical calculations with these.
Decimal – used for fields that need to be interpreted as decimal numbers (1.0, or 2.5, or 3.9 or 20000.99), you plan to do mathematical calculations with these.
Date – used for fields that need to be interpreted as a date, the format used for these fields needs to correspond to one of the following options – YYYY-MM-DD or YYYY.MM.DD, or DD.MM.YYYY, or YYYY/MM/DD, or MM/DD/YYYY (where YYYY – full year, MM – full month number, DD – full day number), an example can be seen in the example file.
Datetime – used for fields that need to be interpreted as date with time attached to it, the format used for these fields needs to correspond to one of the following options : YYYY-MM-DD hh:mm:ss or YYYY.MM.DD hh:mm:ss, or YYYY/MM/DD hh:mm:ss or MM/DD/YYYY hh:mm:ss (where hh - hours in 24 hour format, mm - minutes, ss - seconds)
Data type for accounts
Account numbers are not interpreted as numbers but as text, so make sure to set the data type for the account number as string (text).
- Then you have to select the dimensions for each of the columns that they are going to be mapped to:
a. Always make sure that the date/time is mapped to the Time dimension
b. Always make sure that the account numbers are mapped to the Account dimension
c. Always make sure that any object types/customer classes/item classes are mapped to their appropriate dimensions
d. Always make sure that number values that you plan to do calculations with are mapped to the Measures dimensions
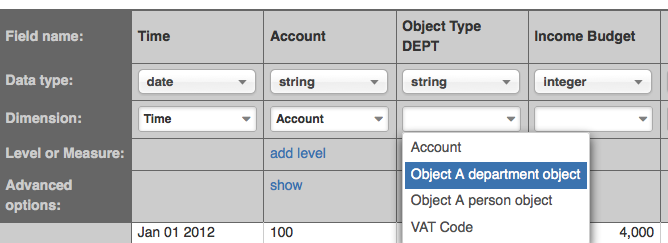
- Under Level or Measure enter the name you want to see for the measure or level in the column. In the example our Income Budget will be mapped to the measures dimension, because we plan to do calculations with it and we have manually entered the name for the measure as Income Budget, you can name this measure what ever you want.

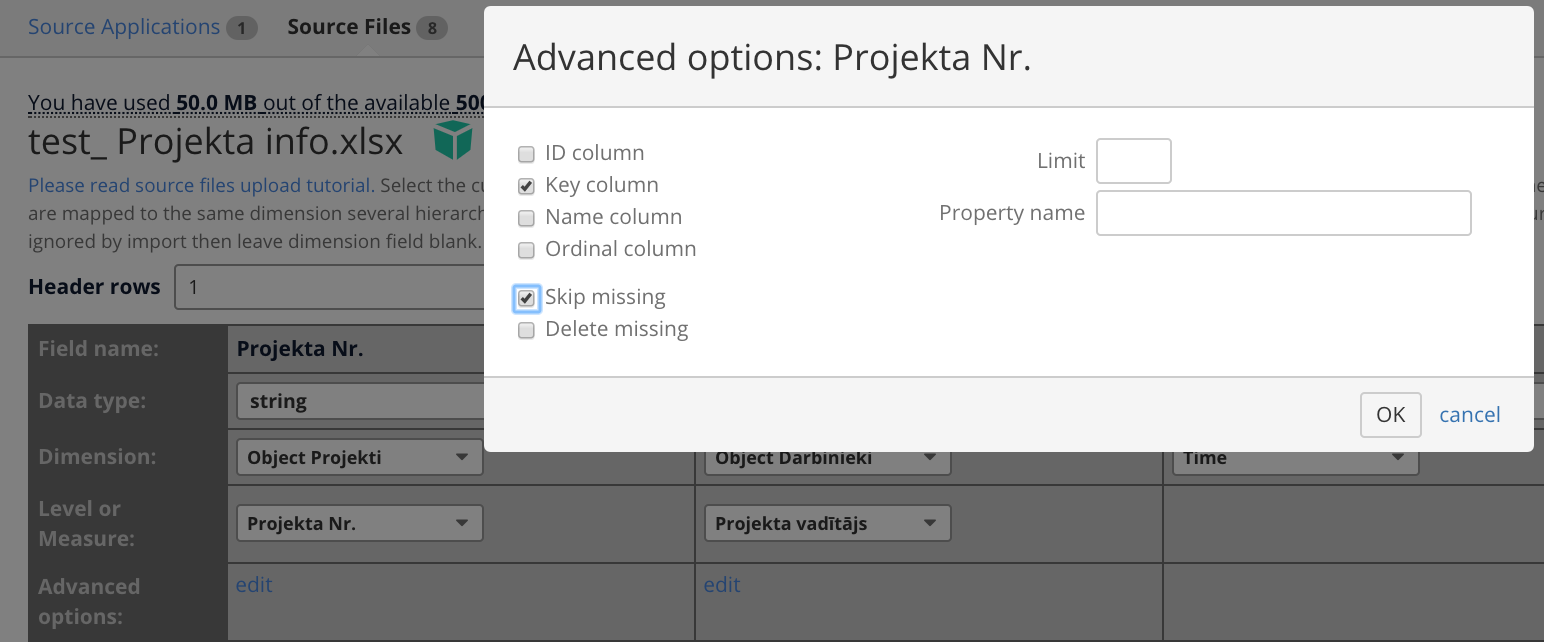
When you need to import several columns as the same dimension attributes then click Edit in Advanced options section and specify the following options:
- ID column – if attribute is unique integer ID attribute of dimension member. If ID column is not specified then dimension members will be identified by key column and IDs will be automatically generated for each new key column value.
Key column – if attribute is unique numeric or string key of dimension member (like issue
number)- Name column – if attribute is longer name that should be displayed as dimension member name (if not specified then key column will be used as name column). But keep in mind that name column still needs to be unique within dimension (therefore in this case we will not use
titleas name as it might not be unique). - Ordinal column – if this attribute should be used to order dimension members.
- Property name – specify if attribute should be imported as additional property for dimension member which is identified by ID or key column.
- When importing date or datetime field as dimension property you can specify additional options:
- Date count measure – specify measure name that should store count of imported rows in this date.
- Date count dimension – specify time dimension which should be used for this measure (by default
Timedimension name is suggested).
- Press Start Import
You should now be able to view the data you have added in the appropriate cube under the appropriate dimension → Select members → User defined.
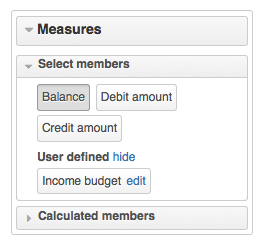
The added measure or level can then be used in reports and in calculated members.
To learn more about mapping, you can check Data Mapping page.